
Disclaimer: Some links are Amazon affiliate links. Purchases made through them help support the recipe testing, photos, and content I share — thank you!
Summary
Fire-kissed peppers that make everything better.
These aren’t your grandma’s jarred peppers. By torching the skins until they blister and char, then steaming them tender, you unlock a depth of smoky-sweet flavor that raw pickled peppers simply can’t match. The white balsamic brine keeps them bright and tangy without overpowering that gorgeous char. Toss them on sandwiches, charcuterie boards, salads, or eat them straight from the jar when nobody’s watching. We won’t judge.
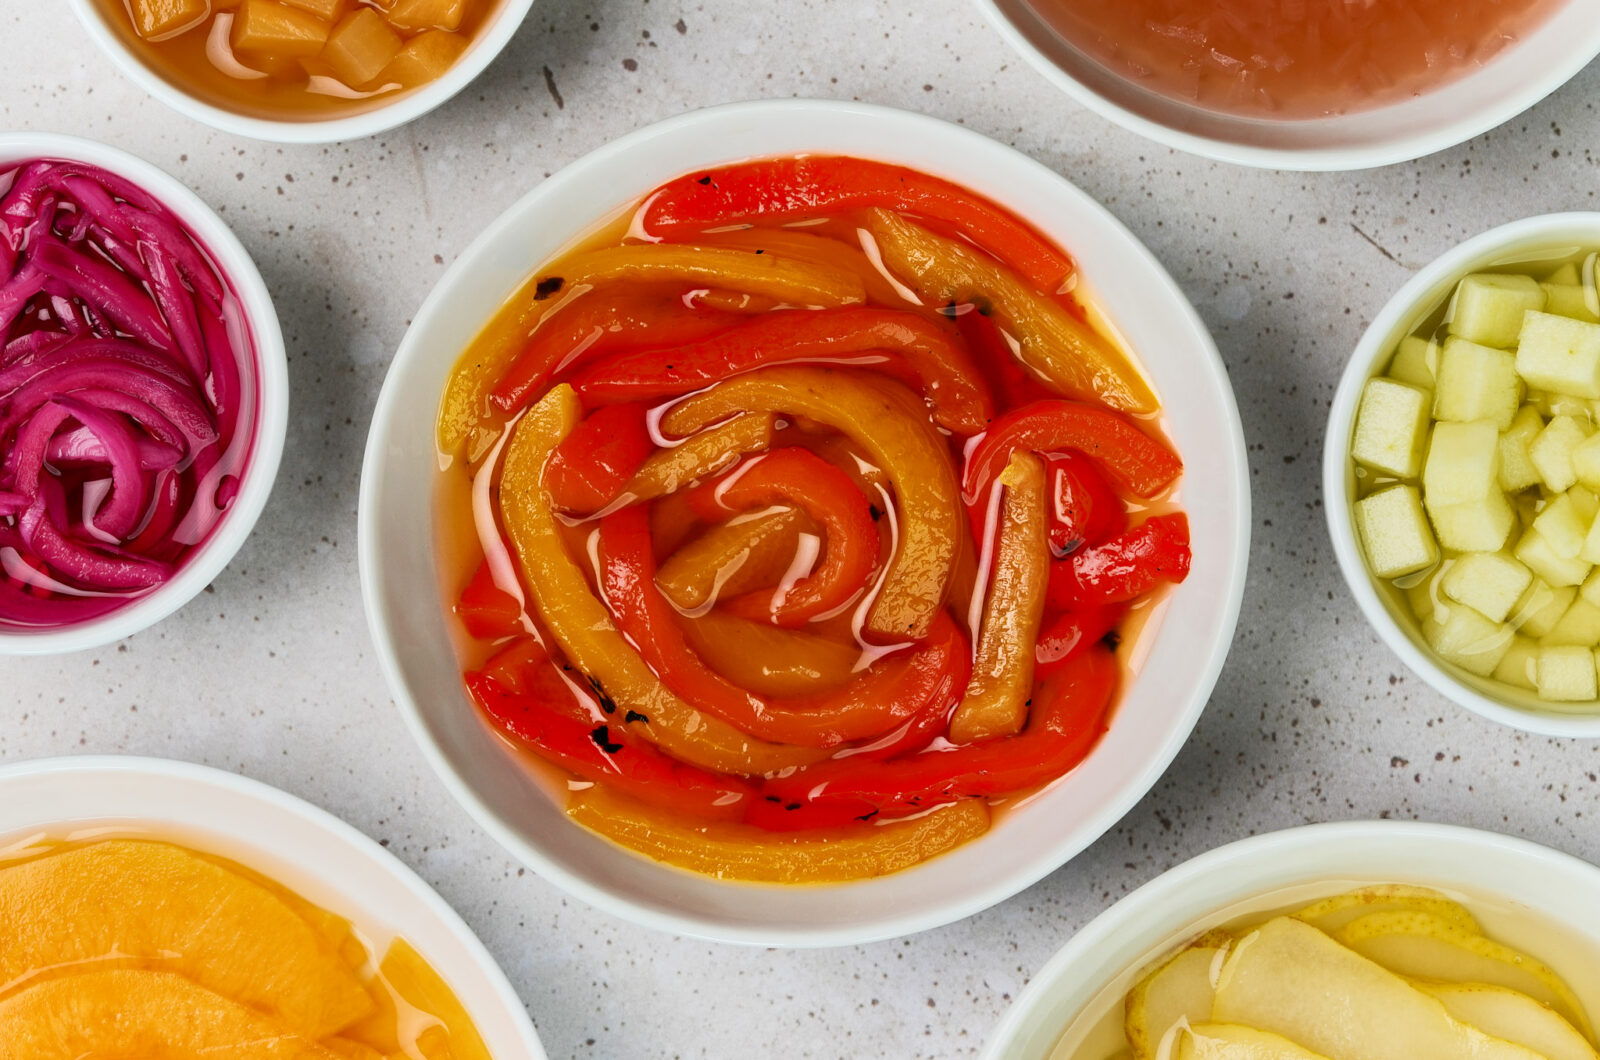
Pickled Bell Peppers (Yellow & Red)
4
cups10
minutes15
minutes45
kcal25
minutesFire-kissed peppers that make everything better.
Ingredients
200 g 1 whole red bell pepper, seeds and stem removed after charring
200 g 1 whole yellow bell pepper, seeds and stem removed after charring
184 g ¾ cup white balsamic vinegar
74 g ⅓ cup sugar or allulose
74 g ⅓ cup water
18 g 1¼ Tbsp kosher salt
Equipment
Directions
Before We Start
Torching Method: A gas stove burner works great – just place the whole pepper directly on the grate over high flame and rotate with tongs. A blowtorch gives you more control. No open flame? Use your oven’s broiler on high, placing peppers on a sheet pan as close to the element as possible.
Keto-Friendly Option: Swap the sugar for allulose 1:1.5. The peppers will taste nearly identical with a fraction of the carbs.
Scaling the Brine: This recipe uses 350g of pickling liquid. You can make a larger batch of brine and store it in the fridge for future pickling projects.Make the Pickling Liquid
For the pickling liquid:
184 g | ¾ cup white balsamic vinegar
74 g | ⅓ cup sugar or allulose
74 g | ⅓ cup water
18 g | 1¼ tbsp salt
In a large bowl, combine the white balsamic vinegar, sugar (or allulose), water, and salt. Whisk vigorously for 3-4 minutes until the sugar and salt are fully dissolved. Set aside. You can reserve this in the fridge for a long time and just use when you need to pickle something.
Alternatively, make a double or triple batch of the brine and store it in a sealed container in the fridge for up to 3 months.
Torch the Skins
Place whole peppers directly over a gas burner on high heat. Using tongs, rotate the peppers every 30-45 seconds until approximately 70% of the skin is blackened and blistered. This should take 4-6 minutes per pepper.
If using a broiler: Place peppers on a sheet pan and position as close to the heating element as possible. Rotate every 2 minutes until evenly charred.
Steam
While the peppers are still hot, immediately transfer them to a bowl. Cover tightly with plastic wrap or a tight-fitting lid to trap the steam. Let them steam for 6 minutes. This loosens the skins and makes peeling effortless.
Peel
Remove the peppers from the bowl. The skins should slip off easily – use your fingers or a paper towel to gently rub away the charred skin. Don’t worry about getting every last bit; small flecks of char add flavor.
Tip: Avoid rinsing the peppers under water. This washes away flavor. A few stubborn bits of skin are fine.
Cut
Slice each pepper into peddles avoiding the middle until all the flesh is removed. Discard the stem and seeds. Cut the flesh into strips about ½ inch (1.5 cm) wide.
You should end up with approximately 240g of usable pepper flesh in total.
Jar and Combine
Add the sliced peppers to your jar. Pour the pickling liquid over the peppers, making sure they are completely submerged. You’ll need approximately 350g of pickling liquid to cover.
Seal the jar and refrigerate. The peppers are ready to eat after 2 hours but taste even better after 24 hours.
You May Like These Recipes Too
Additional Details About This Recipe
How long do these keep?
Stored in the refrigerator, these pickled peppers will last 3-4 weeks. Make sure the peppers stay submerged in the brine.
Can I use other colored peppers?
Absolutely. Orange and red peppers tend to be sweeter, while green peppers are more bitter. Use whatever you have or prefer.
Why torch the peppers instead of pickling them raw?
Torching accomplishes two things: it removes the waxy skin (which can be tough when pickled) and it caramelizes the sugars in the pepper, adding a subtle smokiness that elevates the final product.
What can I use these on?
Everything. Seriously. Sandwiches, burgers, salads, grain bowls, pizza, charcuterie boards, tacos, scrambled eggs, or straight out of the jar as a snack.
Can I reuse the brine?
Yes, once. After the peppers are gone, you can use the brine one more time for a fresh batch. After that, the flavor and acidity will be too diluted.
Is this safe for canning?
This recipe is designed for refrigerator storage only. For shelf-stable canning, you would need to follow proper water bath canning procedures and adjust the acidity levels.
Nutritional Facts (per 60g serving, approximately ¼ of recipe)
(Values are estimates. Using allulose reduces carbs and sugars significantly.)
- Calories: 45 kcal
- Protein: 0.5 g
- Fat: 0 g
- Carbohydrates: 10 g
- Sugars: 8 g
- Fiber: 1 g
- Sodium: 580 mg