Disclaimer: Some links are Amazon affiliate links. Purchases made through them help support the recipe testing, photos, and content I share — thank you!
Summary
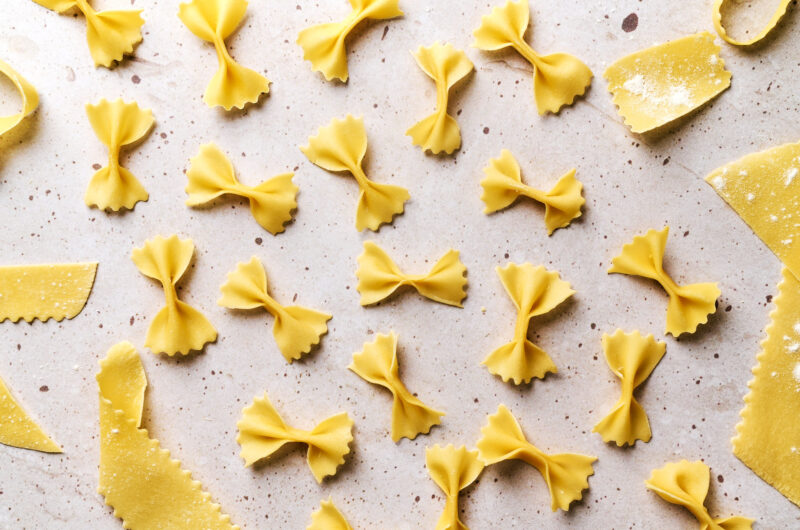
Classic bowtie pasta from scratch—springy, sauce-loving, and shaped by hand.
Farfalle, or bowtie pasta, is one of the most charming shapes to make by hand. It holds onto sauces in its crimped folds and feels elegant and kiddy all at the same time. This version uses a balanced blend of pasta flour and fine semolina flours, whole eggs, and nothing else. We walk you through the process in detail, explaining the why, so you get it right every time.
4
35
minutes285
kcal30
minutes25
minutes1
hour30
minutesFarfalle, or bowtie pasta, is one of the most charming shapes to make by hand. It holds onto sauces in its crimped folds and feels elegant and kiddy all at the same time. This version uses a balanced blend of pasta flour and fine semolina flours, whole eggs, and nothing else. We walk you through the process in detail, explaining the why, so you get it right every time.
Ingredients
225 g 1½ cups 00 flour (Italian style pasta flour)
75 g ½ cup fine (double milled) semolina flour
150 g 3 large whole eggs
Equipment
Directions
Before We Start
Flour Types: We find Italian pasta and gnocchi flour makes the best bowtie pasta. It is tender and rolls nicely. You can substitute “00” or all-purpose here, but the texture is not the same. For the semolina, find double-fine/double ground semolina. It is finer in texture like flour instead of the coarser varieties that is almost like cornmeal.
No Salt in the Dough: Traditional Italian pasta dough is salt-free—add salt only to your boiling water for proper cooking and hydration.
Shaping Farfalle: A pasta wheel helps get clean edges and that signature crimp, but a knife or straight edge works fine too.Make Your Mound
On a clean surface or in a large mixing bowl, combine pasta flour and semolina. Form a mound and make a wide well in the center. Crack eggs into the well.
Whisk and Mix
Use a fork to gently whisk the eggs, gradually incorporating flour from the inner rim. Once it is thick enough to not run off on its own, start mixing by folding the flour walls into the wet mixture and incorporating it all together until it forms a shaggy dough.
There may be more flour on the table than what you need, so don’t force incorporating ALL of it. Typically there is about 15-30g left depending on the flour, size of the eggs, and the humidity in your home.
You want the dough to speak to you about what it kneads…gotta throw in a good pun. Meaning DO NOT FORCE all the flour into your dough. It will collect flour naturally as you bring it together, if there are bits of flour that you have to force into the dough, you are not “letting it speak to you”. It should be a cohesive mass that is firm but workable. It is best to incorporate less flour at first and add more flour later than it is to have too much flour and add water later.
The first few minutes of kneading and combining will feel dry, but will hydrate and smoothen as you knead it in the next step.

Baby, I Knead You!
Knead by hand for 8–10 minutes until smooth and firm.
Checking your moisture levels
A few minutes into kneading it is a good idea to do the seal test. To check if you have the correct moisture in your dough, here is what to look for. First, it shouldn’t be tacky or stick to your hands, or it is too wet and you need to add more flour. If you are good there, you will fold the dough over itself and then pinch it together to seal the seam. If you cannot seal the fold, it is too dry. Add a little water or more egg and work it for a while to incorporate it into the dough until you can pass the seal test.
Kneading your pasta dough
The technique that is used by the best pasta makers, is to use the palms of your hands to push the dough down and away from you. Then fold it over with your other hand bringing the dough back toward you. The aim is the incorporate air into the dough. This creates a better, more tender texture to the pasta as those pockets of air retain some air even after you roll it out.
You know it has been kneaded enough when the dough is getting stiff but it is smooth (no flour bits or broken texture) and pliable.
Rest the Dough
Place the dough in a bowl with plastic wrap or a moist tea towel on top. Wrapping it tightly in plastic wrap also works.
Let it rest at room temperature for 30–45 minutes. This allows the gluten to relax, making it easier to roll.
Roll Out the Dough
Now for the moment of truth. Cut the rested dough into 3 equal pieces. If you see air pockets when you cut into it, congratulations! You successfully incorporated air into your pasta like a pro. If not, well you still are going to have great pasta, so keep a smile on.
Keep unused portions wrapped in plastic or under a clean towel to prevent drying out.
Flatten one piece slightly with your hands, then feed it through the pasta roller attachment on the widest setting (usually even lower than the 1 setting, if your roller allows it). Fold both sides of the sheet over each other, slightly overlapping in the center. Press down on the dough, then roll on the same setting again. You may need to repeat this one more time to help flatten the edges. They don’t have to be perfectly flat.
Continue feeding the dough through the roller, increasing the setting one step at a time, until you reach setting 7 as the final pass. If you start to see uneven thickness in the sheets, that is a sign it needs a light dusting of flour because it is sticking. You should be able to see your hand through the pasta when help up to a light.
I recommend cutting and shaping each sheet one at a time before rolling out the next one. This avoids them drying out and gives you room to work. It is a good idea to lay some plastic wrap or clean towels over the sheet while you work to prevent drying. A fine mister bottle with some water can also help rehydrate the down with a few sprays if it becomes too dry (starts to crack as you shape it).
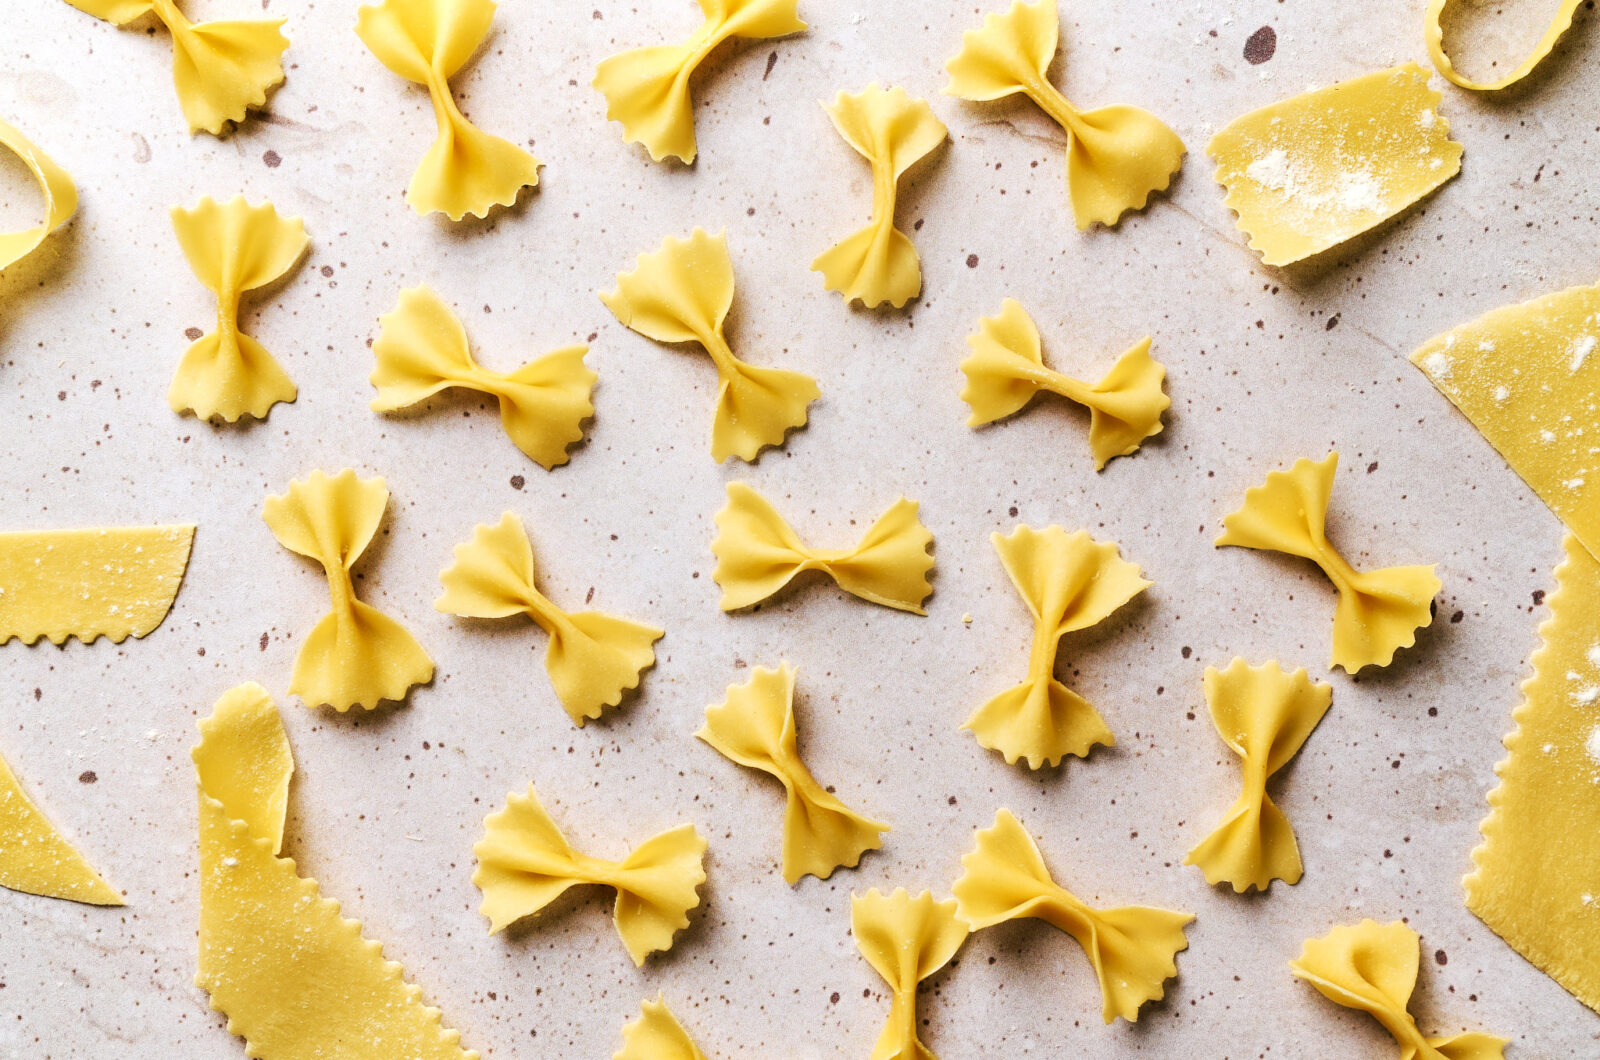
Cut and Shape the Bowties
Using a pasta cutter wheel, bench scraper, or sharp knife, cut the first 6-12 inches of the dough length wise into 1 inch strips. It is helpful to have a ruler or bench scraper with measurements for this.
Then using a crimp style cutter wheel, cut the strips at 1.5 inches in length. Leaving you with rectangles about 1 inch wide by 1.5 inches long (2.5 x 4 cm) with the edges on on the longer ends crimped.
I like working in small sections of the pasta sheet at a time, so if my cuts are off, I can course correct without ruining the entire sheet.
To shape each farfalle:
Grab one of your rectangles and get a small bowl of water. Dip your finger into it, flicking excess water off. Wet the center of the rectangle and gently crimp it length wise, making a W shaped fold/wave with the rectangles. Then pinch the center of each rectangle together using your fingers to form the bowtie shape.
Place on a lightly floured tray or board. Do not stack these on top of each other to avoid sticking.
Repeat with the rest of the rectangles. Then continue cutting the sheet, working in small sections of the pasta sheet at a time. This is helpful, so if your cuts are off, you can course correct without ruining the entire sheet.
Repeat steps 3-4 with the remaining dough.


Cook or Store
If cooking it, bring a large pot of water to a boil. Salt generously (at least 10 g per liter of water). Boil the fresh farfalle for 1–3 minutes or until al dente and enjoy.
If storing, dry on the counter and store in an airtight container for up to 1 week.
You May Like These Recipes Too

Additional Details About This Recipe
Can I use all-purpose flour?
You can—but expect a less tender dough. We recommend sticking with pasta flour + semolina for the best texture or using “00” flour.
Can I freeze the pasta?
Yes! Freeze on a baking sheet in a single layer, then transfer to a bag. Cook straight from frozen.
How long does it take to dry?
At room temp, allow 12–24 hours on a floured surface or mesh rack, flipping halfway through. Use within 1 week or freeze.
Can I color the dough?
Absolutely! Add beet purée, spinach purée, or squid ink to the eggs before mixing for visual flair.
How do I store leftover dough?
Wrap tightly and refrigerate for up to 24 hours. Let it come to room temp before rolling.
Nutritional Facts
(Per 100 g cooked pasta)
- Calories: 285
- Carbs: 49 g
- Protein: 10 g
- Fat: 4 g
- Fiber: 2 g
- Sodium: 0 mg (before salting water)